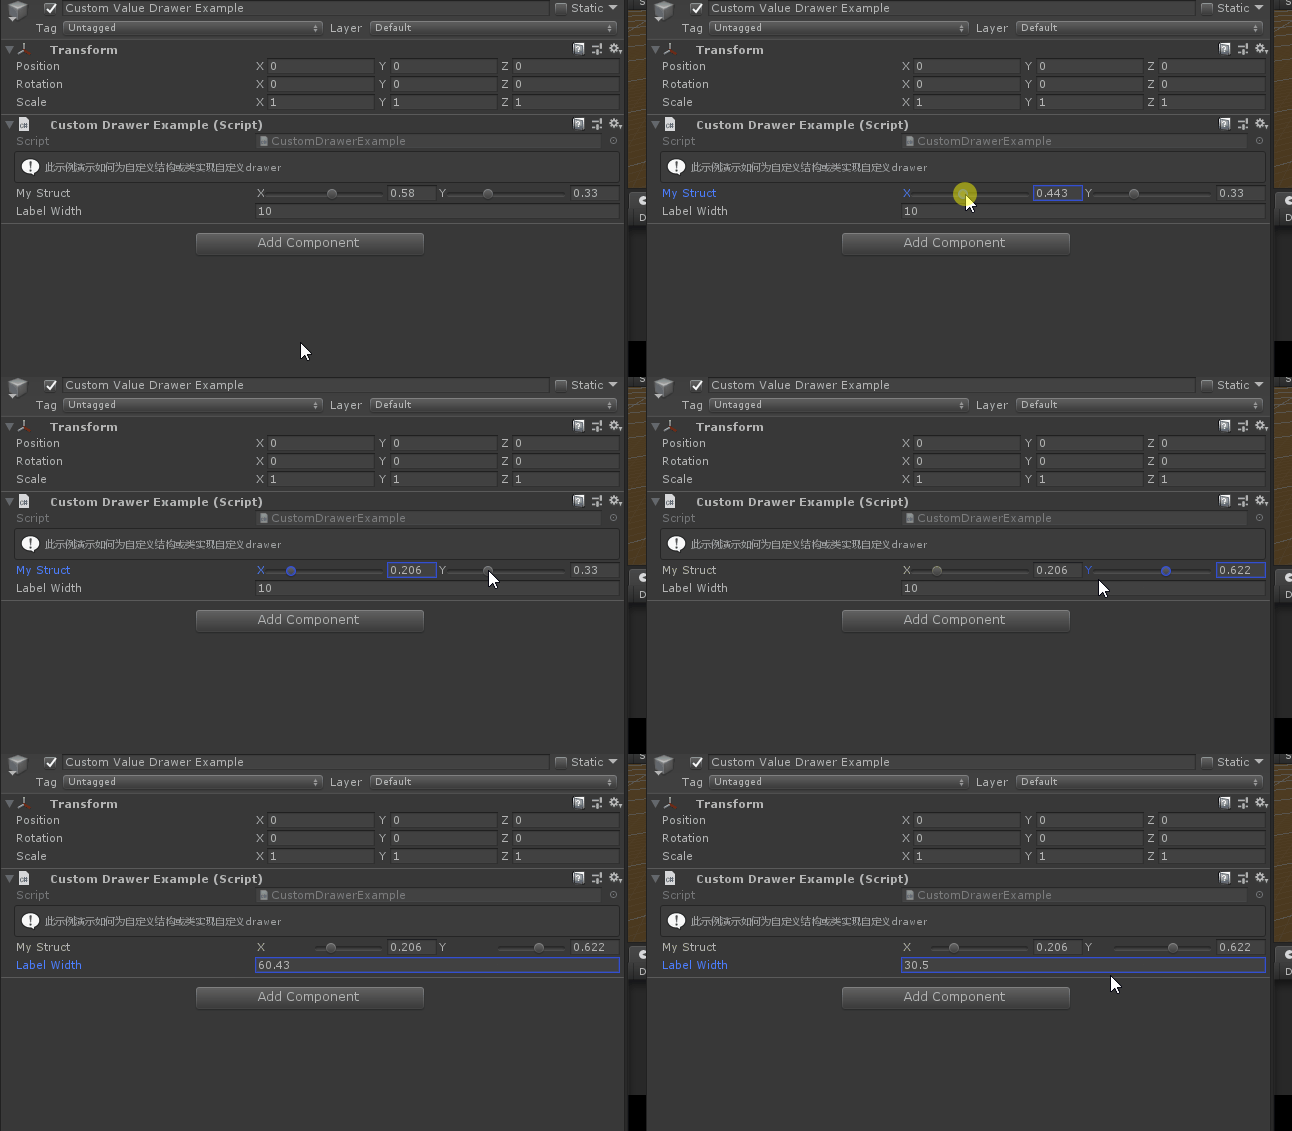
本次讲解的是对应我们自己编写的类或者结构体,按照需求自定义Drawer的简单示例

Value Drawer是Odin最基本的Drawer型,通常是最终在检查员中完成属性最终绘制的绘制。因此,它们通常位于绘制链中的最后一个抽屉中,通常不会延续该链。所以本示例不会出现
this.CallNextDrawer(label);等字样。示例比较简单,我们接下来分几个步骤即可完成
创建我们的自定义类
    // 演示如何为自定义类型生成自定义drawer的示例。
    [TypeInfoBox("此示例演示如何为自定义结构或类实现自定义drawer")]
    public class CustomDrawerExample : MonoBehaviour
    {
        public MyStruct MyStruct;
        [ShowInInspector]
        public static float labelWidth = 10;
    }

    // 自定义数据结构,用于演示。
    [Serializable]
    public struct MyStruct
    {
        public float X;
        public float Y;
}创建一个用于绘制MyStruct的Darwe类
此绘制类需要继承
OdinValueDrawer,并传入对应的类型
    public class CustomStructDrawer : OdinValueDrawer<MyStruct>
    {

    }
开始绘制
准备工作完成,接下来开始真正的绘制,这里我们需要重写
DrawPropertyLayout方法
        protected override void DrawPropertyLayout(GUIContent label)
        {

        }
绘制主要分为以下几个步骤
- 获取我们绘制类的值
- 获取要绘制的区域(rect)
- 保存原始labelWidth的宽度
- 设定新的label宽度
- 根据slider对应的值进行赋值
- 恢复设定原始label宽度
- 将新的Struct赋值给我们定义的MyStruct
        protected override void DrawPropertyLayout(GUIContent label)
        {
            //获取我们绘制类的值
            MyStruct value = this.ValueEntry.SmartValue;

            //获取要绘制的区域(rect)
            var rect = EditorGUILayout.GetControlRect();
            //在Odin中,标签是可选项,可以为空,所以我们必须考虑到这一点。
            if (label != null)
            {
                rect = EditorGUI.PrefixLabel(rect, label);
            }

            //保存原始labelWidth的宽度,此label为struct中对应的X,Y
            var prev = EditorGUIUtility.labelWidth;

            //设定新的label宽度
            EditorGUIUtility.labelWidth = CustomDrawerExample.labelWidth;

            //根据slider对应的值进行赋值
            value.X = EditorGUI.Slider(rect.AlignLeft(rect.width * 0.5f), "X", value.X, 0, 1);
            value.Y = EditorGUI.Slider(rect.AlignRight(rect.width * 0.5f), "Y", value.Y, 0, 1);

            //恢复设定原始label宽度
            EditorGUIUtility.labelWidth = prev;

            //将新的Struct赋值给我们定义的MyStruct
            this.ValueEntry.SmartValue = value;
        }
完整示例代码
#if UNITY_EDITOR
namespace Sirenix.OdinInspector.Demos
{
    using UnityEngine;
    using System;

#if UNITY_EDITOR

    using Sirenix.OdinInspector.Editor;
    using UnityEditor;
    using Sirenix.Utilities;

#endif

    // 演示如何为自定义类型生成自定义drawer的示例。
    [TypeInfoBox("此示例演示如何为自定义结构或类实现自定义drawer")]
    public class CustomDrawerExample : MonoBehaviour
    {
        public MyStruct MyStruct;
        [ShowInInspector]
        public static float labelWidth = 10;
    }

    // 自定义数据结构,用于演示。
    [Serializable]
    public struct MyStruct
    {
        public float X;
        public float Y;
    }

#if UNITY_EDITOR

    public class CustomStructDrawer : OdinValueDrawer<MyStruct>
    {
        protected override void DrawPropertyLayout(GUIContent label)
        {
            //获取我们绘制类的值
            MyStruct value = this.ValueEntry.SmartValue;

            //获取要绘制的区域(rect)
            var rect = EditorGUILayout.GetControlRect();
            //在Odin中,标签是可选项,可以为空,所以我们必须考虑到这一点。
            if (label != null)
            {
                rect = EditorGUI.PrefixLabel(rect, label);
            }

            //保存原始labelWidth的宽度,此label为struct中对应的X,Y
            var prev = EditorGUIUtility.labelWidth;

            //设定新的label宽度
            EditorGUIUtility.labelWidth = CustomDrawerExample.labelWidth;

            //根据slider对应的值进行赋值
            value.X = EditorGUI.Slider(rect.AlignLeft(rect.width * 0.5f), "X", value.X, 0, 1);
            value.Y = EditorGUI.Slider(rect.AlignRight(rect.width * 0.5f), "Y", value.Y, 0, 1);

            //恢复设定原始label宽度
            EditorGUIUtility.labelWidth = prev;

            //将新的Struct赋值给我们定义的MyStruct
            this.ValueEntry.SmartValue = value;
        }
    }
#endif
}
#endif